Recipe Formulation: American Brown/Dubbel split batch
Posted: November 21, 2011 Filed under: Uncategorized Leave a comment »I am finding that one of the nice things about having a ten gallon system is the ability to split a batch in two and do two different beers. Last time this involved splitting the ABF Saison between the two Wyeast strains: 3711 & 3724. Those beers are subtly different with 3711 a little spicier and dryer and 3724 slightly fruitier with a little more body, but also quite dry.
For my next batch I wanted two more distinctly different beers. American Brown & Dubbel both have some similarities in general color and low bitterness, but also some differences. The big differentiator will be the yeast. American Ale II has a clean profile with a slightly nutty body. I also have a tone of it washed and ready to go in the fridge. For the belgian strain I have been meaning to use Belgian Ardennes (the La Choffe yeast) for a long time. These two yeast alone should produce strong flavor differences, but with some additional adjustments I am going to see if I can get “in-style” on both without really adding any time to my brew day. The style guidlines are as follows:
| Style | OG | FG | Color | IBU | ABV |
|---|---|---|---|---|---|
| American Brown | 1.045 – 1.060 | 1.010 – 1.016 | 18.0 SRM – 35.0 SRM | 20 IBU – 40 IBU | 4.3% – 6.2% |
| Dubbel | 1.062 – 1.075 | 1.008 – 1.018 | 10.0 SRM – 17.0 SRM | 15 IBU – 25 IBU | 6.0% – 7.6% |
The styles overlap in IBUs & FG, but not in OG or Color. I started with a malt bill in common, that is the lesser of the two in each case where they diverge:
- 13.5 lb Maris Otter
- 3 lb Amber Malt (20L)
- 1.5 lb Brown Malt (57L)
- 1 lb Belgian Caramel Vienna
- 1 lb Caramel 40L
- 60 Min 2.5 oz Crystal
- 30 Min 2 oz Willamette
- At turn off 2.5 oz Crystal
| American Brown | Dubbel | |
|---|---|---|
| Malt Bill |
|
|
| Hops |
|
|
| Yeast | Wyeast 1272-American Ale II | Wyeast 3522-Belgian Ardennes |
| Effective OG | 1.056 | 1.062 |
| Target FG | 1.014 | 1.010 |
| IBU | 40 (calculated as first wort hops, probably less) | 24 |
| SRM | 19.9 | 16.9 |
| ABV | 5.6% | 6.9% |
Should be two pretty different beers, one still relatively tight brew day. More to come…
Building a 10 gallon All-grain Wooden Homebrew Rig — Design
Posted: March 3, 2011 Filed under: Uncategorized Leave a comment »1. Design
Design Choice #1 — Tiers
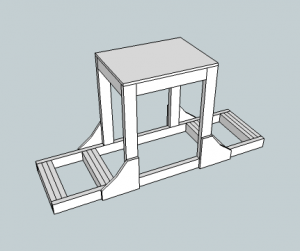
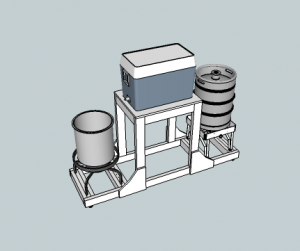
 I pretty early settled on 2-tier. The brew rig would live in the garage of a 1920s house, that had a ~7.5′ ceiling. I’m also not a huge fan of putting scalding liquids above my head. So that made a 3-tier system, not my choice.
A single tier system was an option, but would require 2 pumps. I liked the idea of using the pump only to move hot water to the mash tun, as this would limit the likelihood of bacteria or wild yeast in the pump.
Design Choice #2 — Vessels
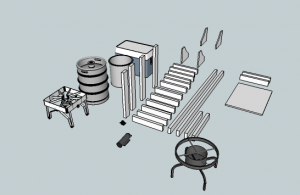
 I decided pretty quickly to use my existing keggle as a hot liqueur tank. It already had a valve and only really needed a thermometer and a sight glass or some other way of measuring volume. Because it would only contain water, scorching was no issue on the relative thin bottom.
I spent a lot of time thinking through the mash tun. In the end the choice of mash tun will determine which brewing process is most convenient. Coolers (without electrical elements) lend themselves to single infusion mashes where one temperature is held for a long period of time. A step mash could be theoretically possible by adding boiling water, but would require the right recipe and probably somewhat limited in application. Brew kettles that can be direct fired are better for step mashes where several different temperatures are held for shorter periods of time. Either type of vessel is pretty good for decoction mashes. I didn’t consider the applicability of the mash tun for either RIMS or HERMS as I wanted a simpler first system. Jumping at either of those choices involves lots more complexity and a whole new set of decision criteria.
I landed on a cooler, because I anticipated doing a lot of single infusion mashes, which take less time and are easier to replicate the process from one batch to another. Cost was a factor too. A cooler mash tun will run ~$70 once you are done with building a manifold, a valve and pay tax and potentially shipping. A keggle with a false bottom, valve and additional burner is likely $100+, assuming you do the conversion yourself. A pro kettle, with all the bells and whistles will be closer to $300 – $400. Starting with a cooler and upgrading to a direct fire mash tun down the road is reasonable as well.
Finally for the boil kettle I wanted a good stainless steel brew kettle with a three ply bottom. Having a sandwiched layer of aluminum provides better heat distribution and helps prevent scorching. I asked for this for Christmas and got a top of the line Blichmann Boilmaker, with a thermometer, that I plan to use on the keggle for the HLT. Woohoo!
Design Choice #3 — Size
 I wanted some flexibility in style of beer and batch size: 10gallon lower gravity brews and 5 gallon high gravity brews with some possible 7 or 8 gallon batches in-between. To achieve this I went wi the following:
- 15.5 Gallon Keggle HTL
- 52 Quart (13 Gallon) Coleman Xtreme Cooler
- 15 Gallon Blichman Boilmaker
This system should handle batches from 15-30 lbs of grain pretty well.
Reference
Great thread on wooden homebrew rigs, with lots of pictures and info
Building a 10 gallon All-grain Wooden Homebrew Rig — Introduction
Posted: February 15, 2011 Filed under: Uncategorized Leave a comment »The following is an adventure in a first time build of an all grain system.
I’m a homebrewer going back to 2000. I’ve been brewing extract for most of those years, often with specialty grains or a partial mash. I’ve done some all grain batches, but they were complicate precarious Rube Goldberg experiments, often involving searing liquids perched on barstools and what not. Because I didn’t have the right equipment, it was always a mess and the results were mixed.
I wanted instead to build something that would allow me to focus on my process while brewing, not problem solving anew for equipment with each new batch. I love to build homebrew solutions and the need to problem solve and create equipment is one of the best parts of the hobby. But I want to be focused at one thing at a time: brewing or building. Trying to do all grain without a good system, was always doing some part of both. The result for me was that I couldn’t build on what I learned and repeat my process. The great homebrewers I have met, pretty consistently will say that learning to repeat and control your process is where you can really take your craft to the next level. So that is what I want. A system I can control, that has process that are repeatable and that will allow me to focus on brewing.
For cost and good old recycling reasons I decided it would be a requirement to use as much as I had around from previous brewing: a keggle, a Camp Chef burner, an emersion chiller and other things. Also I would use as much as possible the scrap wood in the garage, old bed frames, etc…
Also, within reason given all the recycling, I wanted it to look good.
Recent Comments