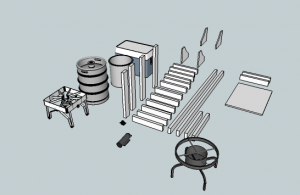
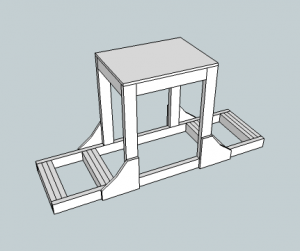
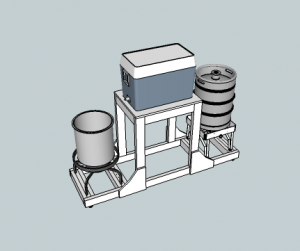
Building a 10 gallon All-grain Wooden Homebrew Rig — Design
Posted: March 3, 2011 Filed under: Uncategorized Leave a comment »1. Design
Design Choice #1 — Tiers
 I pretty early settled on 2-tier. The brew rig would live in the garage of a 1920s house, that had a ~7.5′ ceiling. I’m also not a huge fan of putting scalding liquids above my head. So that made a 3-tier system, not my choice.
A single tier system was an option, but would require 2 pumps. I liked the idea of using the pump only to move hot water to the mash tun, as this would limit the likelihood of bacteria or wild yeast in the pump.
Design Choice #2 — Vessels
 I decided pretty quickly to use my existing keggle as a hot liqueur tank. It already had a valve and only really needed a thermometer and a sight glass or some other way of measuring volume. Because it would only contain water, scorching was no issue on the relative thin bottom.
I spent a lot of time thinking through the mash tun. In the end the choice of mash tun will determine which brewing process is most convenient. Coolers (without electrical elements) lend themselves to single infusion mashes where one temperature is held for a long period of time. A step mash could be theoretically possible by adding boiling water, but would require the right recipe and probably somewhat limited in application. Brew kettles that can be direct fired are better for step mashes where several different temperatures are held for shorter periods of time. Either type of vessel is pretty good for decoction mashes. I didn’t consider the applicability of the mash tun for either RIMS or HERMS as I wanted a simpler first system. Jumping at either of those choices involves lots more complexity and a whole new set of decision criteria.
I landed on a cooler, because I anticipated doing a lot of single infusion mashes, which take less time and are easier to replicate the process from one batch to another. Cost was a factor too. A cooler mash tun will run ~$70 once you are done with building a manifold, a valve and pay tax and potentially shipping. A keggle with a false bottom, valve and additional burner is likely $100+, assuming you do the conversion yourself. A pro kettle, with all the bells and whistles will be closer to $300 – $400. Starting with a cooler and upgrading to a direct fire mash tun down the road is reasonable as well.
Finally for the boil kettle I wanted a good stainless steel brew kettle with a three ply bottom. Having a sandwiched layer of aluminum provides better heat distribution and helps prevent scorching. I asked for this for Christmas and got a top of the line Blichmann Boilmaker, with a thermometer, that I plan to use on the keggle for the HLT. Woohoo!
Design Choice #3 — Size
 I wanted some flexibility in style of beer and batch size: 10gallon lower gravity brews and 5 gallon high gravity brews with some possible 7 or 8 gallon batches in-between. To achieve this I went wi the following:
- 15.5 Gallon Keggle HTL
- 52 Quart (13 Gallon) Coleman Xtreme Cooler
- 15 Gallon Blichman Boilmaker
This system should handle batches from 15-30 lbs of grain pretty well.
Reference
Great thread on wooden homebrew rigs, with lots of pictures and info
Recent Comments